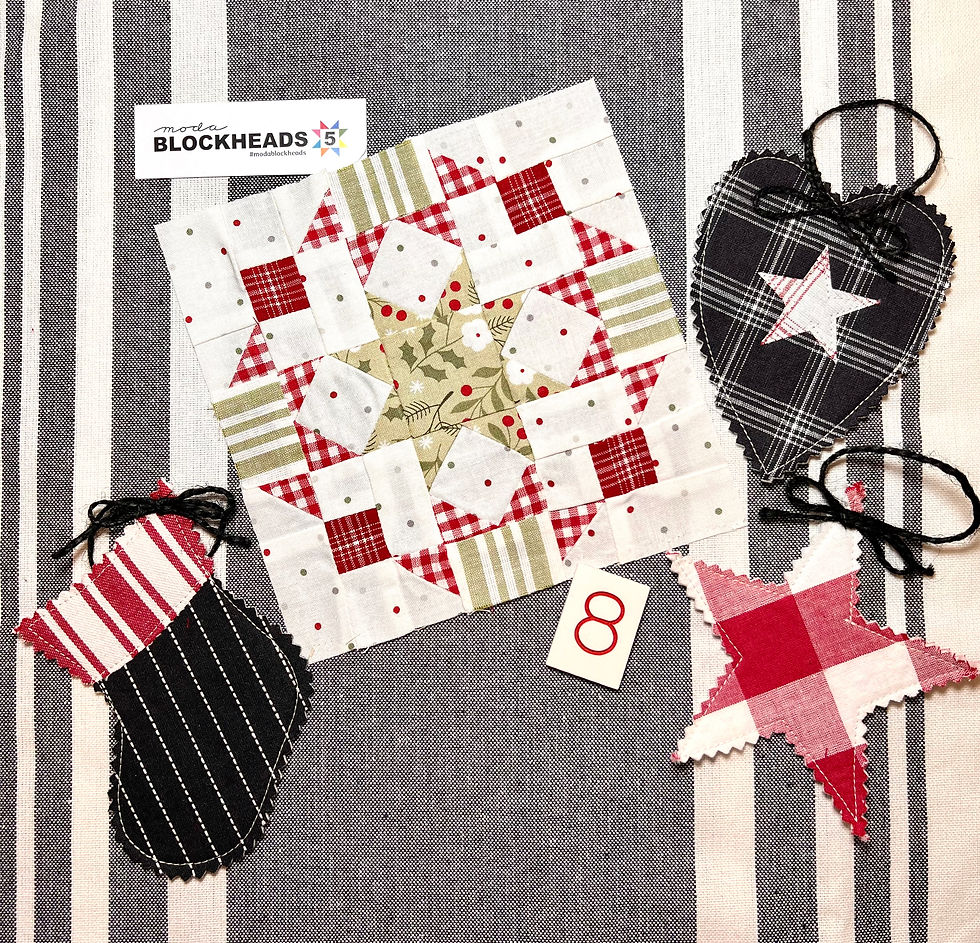
Blockheads 5 - Block 8
- Jenelle Kent
- Nov 1, 2023
- 2 min read
Wow! This sweet block by Robin Pickens was quite the challenge. Lots of tiny pieces and I did lots of unpicking because I kept making mistakes! My excuse is that I made it while on a weekend sewing retreat, so I was doing lots of talking and laughing at the time, but it's no excuse really. It's not that tricky, you just need to concentrate and spray starch everything first.

I have fussy cut the stripes for this block. The F section is made with my green Vista stripe and you can see I cut them all the same, radiating out from the centre. Once you have cut the first one, use this as your template to cut the other 3.
The tiny red checks for the C squares were also fussy cut. I have centred the same section of the check in the middle of each square.
I did do something different for the G-H-I section of the block. As you know, I try to use stitch-and-flip where possible, avoiding triangles as much as I can. I have nothing against triangles, but I find the stitch-and-flip method gives me a better result.
So the alternative cutting instructions for G-H-I are as follows:
6 ½" block
G cut - 2" x 2" (x4)
H cut -1 ¼" x 1 ¼" (x8)
I cut - 1 ¼" x 1 ¼" (x8)
12 ½" block
G cut - 3 ½" x 3 ½" (x4)
H cut - 2" x 2" (x8)
I cut - 2" x 2" (x8)
Place an H and I square on opposite corners of the G square and sew across the diagonal. I always use diagonal seam tape. Trim and press.
Repeat for the remaining 2 corners of the G squares.
Make 4 of each.
In giant neon lights - LAYOUT YOUR PIECES PRIOR TO STITCHING THE BLOCK TOGETHER!!
LoL, this is avoid all the unpicking I did while making this one.
It's a lovely looking block and I think it would make a great throw pillow, sized up to about 18" square. Anyway, that's and idea for when I have a little more time.
I hope you have fun with this one,
Happy sewing
Jenelle
Comments